Showing posts with label My knit designs. Show all posts

Monday, August 26, 2019

Sock Diagram


At times you need to see a diagram of a sock pattern. 

I decided to post one here for easy reference.


The sock shown was knit by Kathy Green.
The pattern is Joann Socks on Ravelry.

Saturday, February 20, 2016

Picot Bind Off

I have designed several shawls with a Picot Bind Off.
So I decided it was time to assist others in using the Picot Bind Off.

I always use the next larger needle for the bind off.
For this example I am using the Audrey's Shawl.
It is a worsted shawl designed for a child.
The shawl is knit with a US8 (5 mm) and I used a US9 (5.5 mm) for the bind off.

Even when knitting a shawl with fingering weight yarn, 
I use one size larger needle for the bind off.

First you bind off 2 stitches as you normally would.
Then you slide the stitch from right hand needle to the left hand needle.

Insert the needle between the two right most stitches on your left needle. 

Pull the yarn through.

Place on the left hand needle, without twisting. 


Repeat to add the second cast on stitch. 


Should have 3 loops separated from the other stitches on the left hand needle.

Bind off 5 stitches. 


I give the picot a tug. 

Place the remaining stitch on the left hand needle,
repeat the process until you bind off all the stitches.


When I am sitting I am knitting.
I hope you will join me in the Ravelry Heirloom Goods
knitting group.


Monday, September 28, 2015

Leedra's Edge and Bind Off

 I designed my first shawl in 2011.

I design bottom up shawls and I design top down shawls.  But it seems no matter whether it is bottom up or top down I prefer to use a seed stitch edge for the border.  I have designed a few shawls without this seed stitch edge, but not many.   For the top down shawls the seed stitch is started as a neck tab which just continues down the edge on both sides as you knit the shawl.  In the photo below you can see the first stitch is always slipped.  I slip this stitch purlwise.  The working yarn is then taken in front of the work and between the needles to the back of the work, ready to work the next stitch.  If you take the yarn behind the needle to the back it will not look the same, so you need to be consistent in the way the yarn is taken to the back.  With a top down shawl the seed stitch is always six stitches.  With the bottom up shawl the seed stitch can be either four or six stitches.
Because I like the seed stitch for most designs I needed to come up with a good way to continue the edge around the neck when designing a bottom up shawl.  So I designed what was quickly named Leedra's Edge and Bind Off  by my test knitters. 

I have designed several shawls ending with Leedra's Edge and Bind Off, they are
and

The edge stitches are the same whether working the right side and wrong side rows.
At the beginning of the rows my six stitch seed stitch edge is worked as follows:
Slip 1, k1, p1, k1, p1, k1.
The end of the rows are worked as follows:
k1, p1, k1, p1, k2.

After a shawl is complete except the neck is when Leedra's Edge and Bind Off is used.
Leedra's Bind Off is completed with one size needle smaller than the shawl is knit with.
This is accomplished by changing to the smaller needle and knitting the last wrong side row immediately before the beginning of the bind off with the smaller needle.
With the right side facing Leedra's Edge and Bind Off is worked as follows:
Notice in the photos one side is still on the circular needle used for the shawl,
And I started using a double point needle for the other end.
Slip 1, (k1, p1) x2, k3tog, 
turn,

(k1, p1) x2, k2, 
turn.
Repeat until there are a total of 12 stitches remaining.
(6 stitches on each needle)
End with the k3tog, without turning.
 When there are 6 stitches on each needle the 6 stitches on the circular needle can be moved to a double point needle.  Turn the two double  point needles so the wrong sides are facing each other.  This places the yarn on the back needle on the right side.  This is the correct location for grafting the 12 stitches together using the Kitchener Stitch method.
For convenience I have added instructions for the Kitchener Stitch at the
bottom of this blog post.
Due to the k3tog stitches,
after the Leedra's Edge and Bind Off is completed you can see a small hole.  
With shawls the hole is just another design element.
The photo below shows the side edge as it curves at the front of the shawl.
And this last photo shows the curve created for the neck of the shawl.

Kitchener Stitch Setup:  

Attach your yarn to a darning needle and thread the yarn through the first stitch on the front needle as if to purl and leave the stitch on the needle.  Then thread the yarn through the first stitch on the back needle as if to knit and leave the stitch on the needle.
Kitchener Stitch:  

Step 1:  
Thread the yarn through the first stitch on the front needle as if to knit, and slip the stitch off the needle.

Step 2:  

Thread the yarn through the next stitch on the front needle as if to purl and leave the stitch on the needle.
Step 3:  

Thread the yarn through the first stitch on the back needle as if to purl and slip it off the needle.
Step 4:  

Thread the yarn through the next stitch on the back needle as if to knit, and leave the stitch on the needle.
Repeat steps 1 thru 4 until all the stitches are off both needles.


Saturday, July 5, 2014

Adding pocket to purse

This blog post is about adding a pocket to a hand knit purse,
after finishing the knit of the purse but before felting the purse.
For this demo I am using a purse with a different color stripe to assist in the addition.

First, you need to find the middle 27 stitches (or the number you wish to use)
and mark with stitch markers.  If you mark to the right of the most right stitch and
to the left of the most left stitch you will have 28 stitches marked.

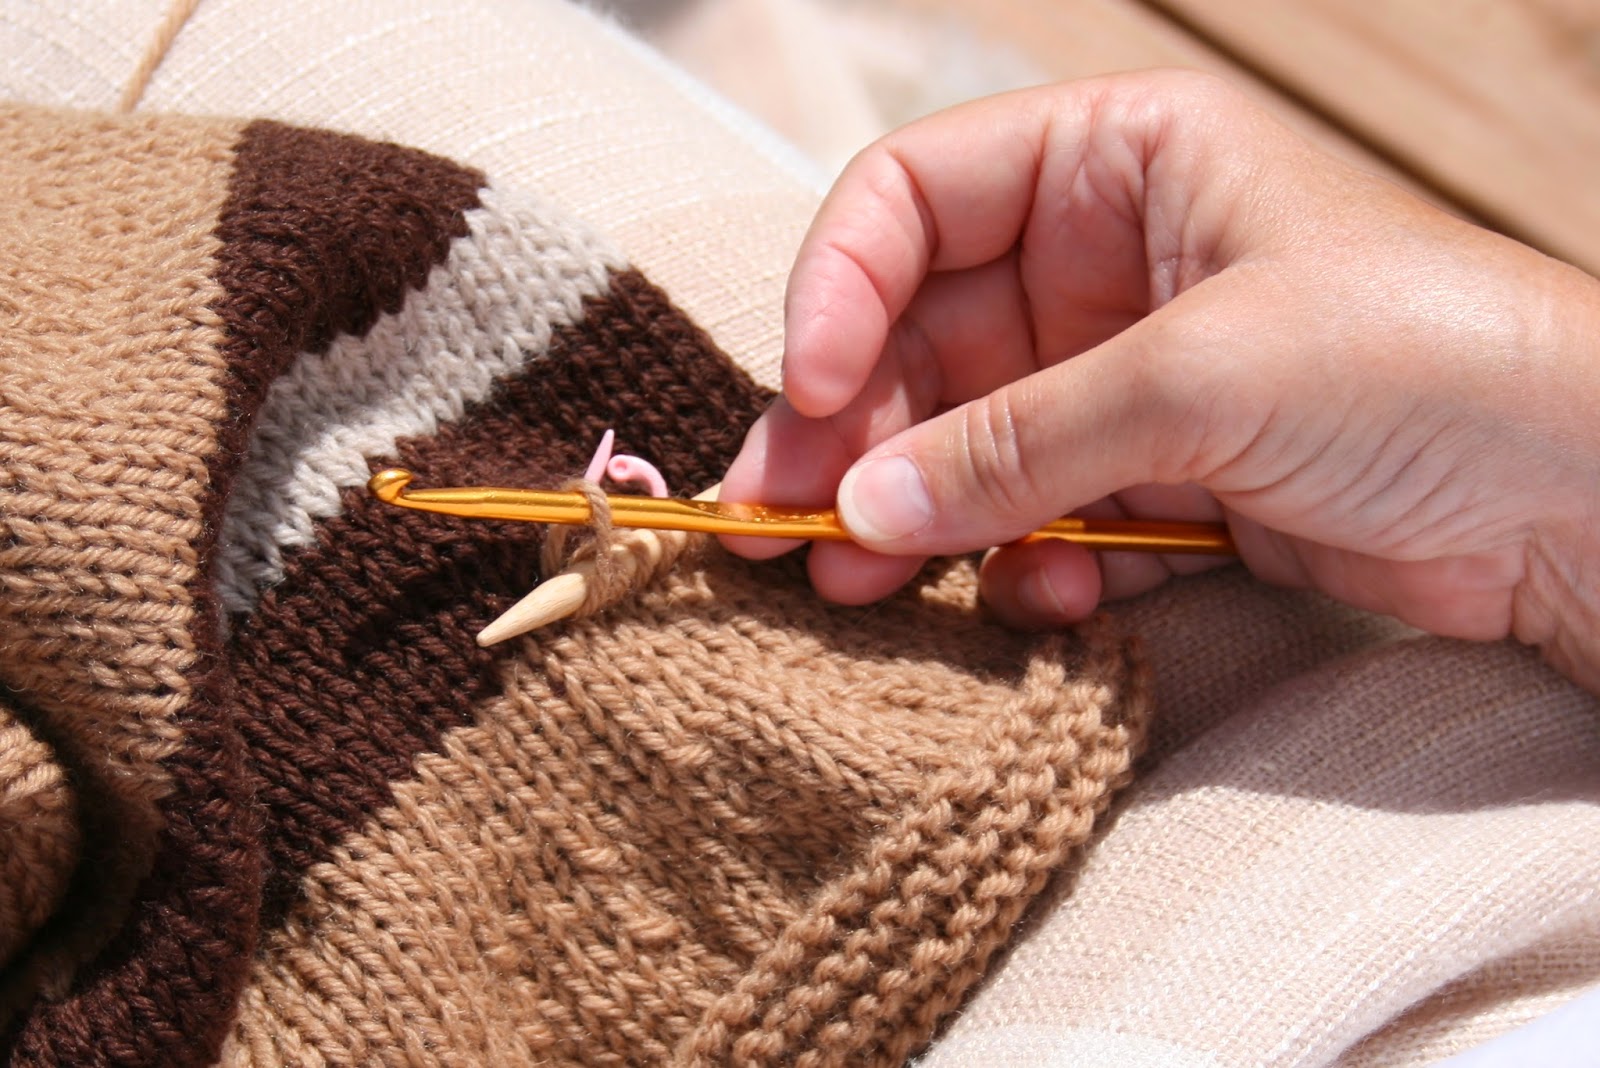
From the inside of the purse, using a crochet hook, pull the yarn through
a space one row up and 1/2 stitch toward the middle of the purse.

Pull about 24 inches of the yarn to the inside of the purse.

Go to the right side of the purse and directly below the
stitch marker you placed insert the crochet hook. 

Pull the yarn through to the outside of the purse.

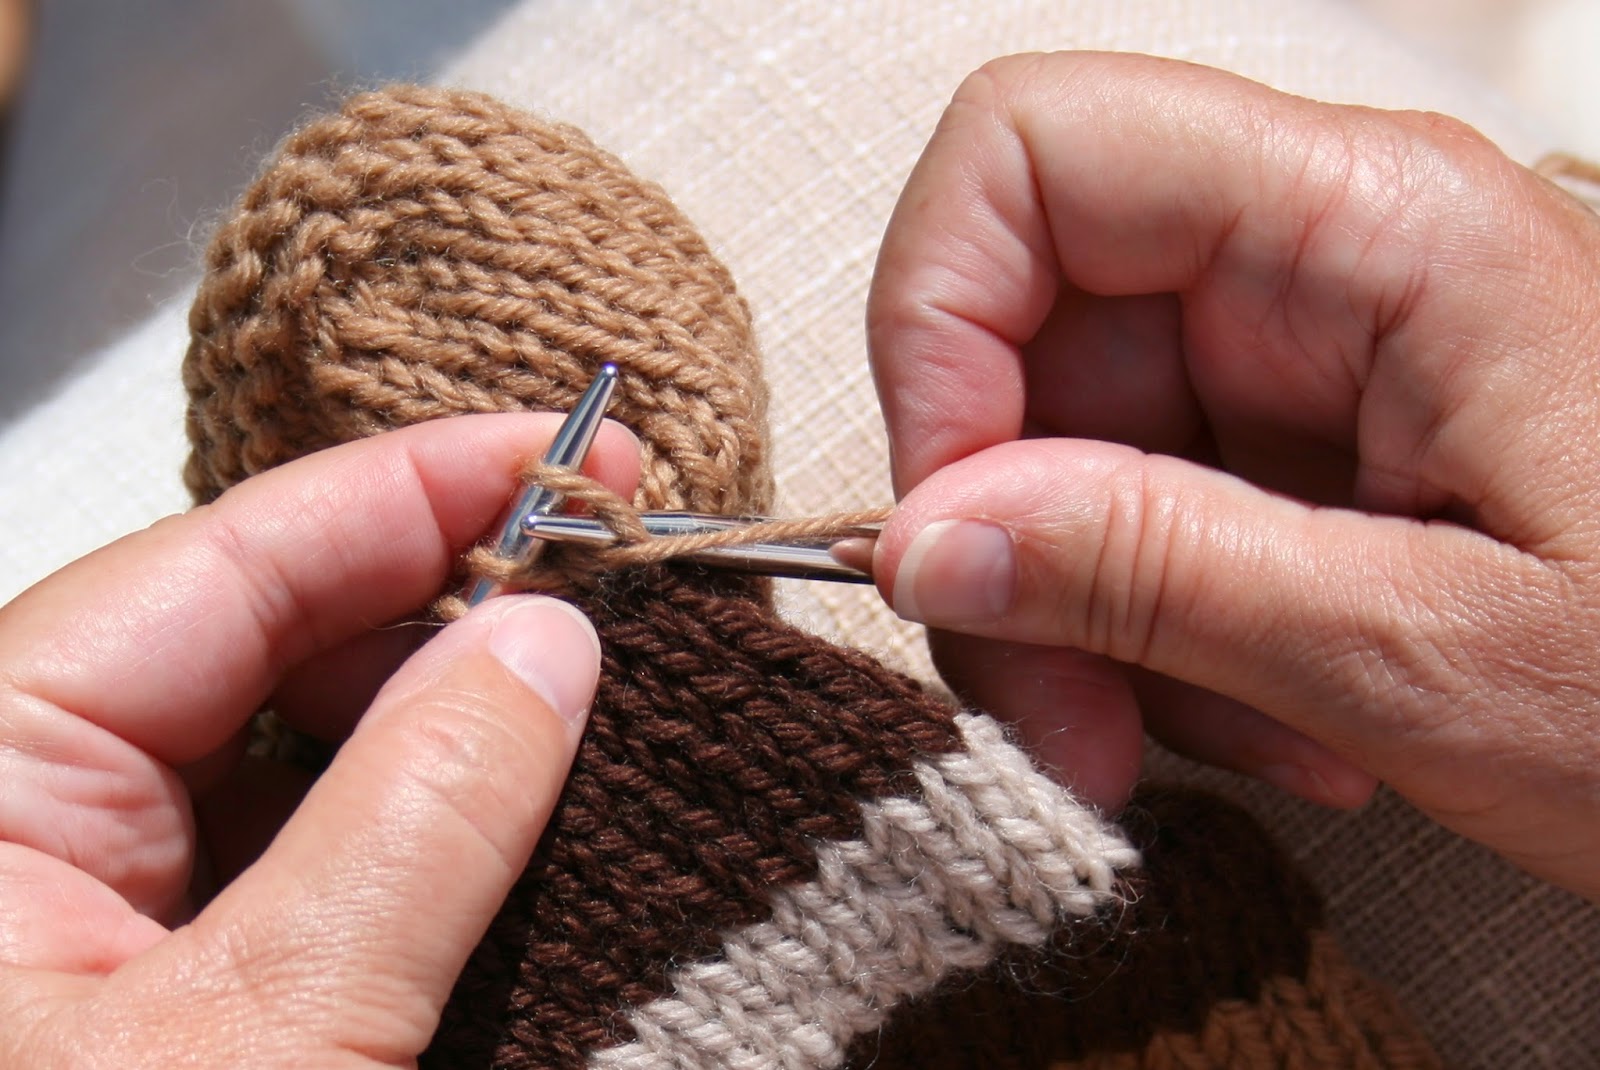
Place the yarn on a double point needle,
the same size needle as your original project.

Continue in this manner.
As you continue be careful to move over a full stitch and not a half stitch.

After I have about 10 stitches on the double point
I transfer them to a 24 inch circular needle.

I continue until I have all 28 stitches on the knitting needle.
Notice the original pull through is above the row.

Turn the purse.

Purl the first row, and all the odd number rows.

Knit the even number rows to create stockinette.
40 to 50 rows is a good number of stockinette rows.
End with a WS knit row, RS knit row, and WS knit row.
Bind off knitwise.  Sew the pocket to the purse before felting.
Height of pocket before felting was 9 1/2 inches.

And the photo after felting.
This pocket I knitted 50 rows of stockinette;
ending with 3 rows of garter stitch.
Height of pocket after felting was 5 1/2 inches.

I do felt my items to the point of no stitch definition showing.
When I design felted items I use US10 (6.5mm) needles 
with one strand of yarn.
I used a H (5mm) crochet hook for this demonstration. 


Thursday, July 3, 2014

Sea the Waves Shawl

The inspiration for this shawl came from the beaches along the Gulf of Mexico.  For my second knit of the shawl I used Three Irish Girls Congdon Merino Silk yarn, in the exclusive colorway of Gulf of Mexico only available at A Good Yarn - Sarasota; in Sarasota, Florida.  This colorway really is the color of the water on the Florida Gulf of Mexico coast.
(Modeled by Lindsey Harrell)
The bottom border is representative of the waves and the intricate lace section
is representative of the palm trees and shells along the shore.
My first knit of the shawl I used Peppino by Rhichard Devrieze.  With the color (Fondly) of this yarn the intricate lace portion of the shawl really reminds me of my favorite seashell (Vanhyning's Cockle), found along the shores of St Pete Beach.  Which, by the way, is my very favorite place to vacation.
Modeled by me.

Kelly Ramsey also was nice enough to model the shawl for me.
This shawl is now the store sample at A Good Yarn - Sarasota.
This is my 19 design to release in my Ravelry store.
Sea the Waves pattern is available  to purchase, and is
also available in my ETSY store. 

Monday, February 10, 2014

Smoky Mountain Moebius Cowl


I find the moebius cast on to be very addictive.  
When I knit a moebius cowl I want to knit another one.


As you can see I did knit this one several times,
even before I handed the design over to test knitters.
I designed this one with a simple eyelet that gives it 
a lacy design without much concentration while knitting.


 Some of my test knitters made more than one also.  
The ones here were all knit by me and 
are being modeled by my daughter-in-law, Lindsey.


The hardest part to learn about Moebius cast on is that the knitting is growing from the middle of the design out.  You are not knitting from one end or the other.  Another tip for the first time moebius knitter is to be absolutely sure you have gone around the moebius the full circle.  To assure this it is best to add a marker and until the marker is back at your needle tip you have not completed the design.  This was the hardest for me as a new moebius knitter.  I thought when I got back even with the marker, although it was on the cable below my knitting, I had completed a full repeat of the design.  After having to remove stitches ( a LOT of stitches) I didn't make that mistake again.   

I named this pattern, the Smoky Mountain Moebius, because I live so close to the Smoky Mountains.
The pattern is available in my Ravelry store.